Binary Representation of Images (Festive version)
In this lesson, students learn how a computer represents an image using binary.
For non-festive version, click here
Suggested time: 100 mins
Learning Objectives:
Curriculum Mapping:
KS3:
In this lesson, students learn how a computer represents an image using binary.
For non-festive version, click here
Suggested time: 100 mins
Learning Objectives:
- Explain the representation of an image as a series of pixels represented in binary
- Explain the need for metadata to be included in the file such as height, width and colour depth
- Discuss the effect of colour depth and resolution on the size of an image file
Curriculum Mapping:
KS3:
- Understand how data of various types (including text, sounds and pictures) can be represented and manipulated digitally, in the form of binary digits.
Introduction: (Teacher guide)
Data in computers is stored and transmitted as a series of ones and zeros (also known as Binary).
To store an image on a computer, the image is broken down into tiny elements called pixels. A pixel (short for picture element) represents one colour. An image with a resolution of 1024 by 798 pixels has 1024 x 798 pixels (817,152 pixels).
In order for the computer to store the image, each pixel is represented by a binary value. We call this representation of colours a “bit-plane”. Each bit doubles the number of available colours i.e. 1-bit would give us 2 colours, 2-bits would give us 4 colours and 3-bits would give us 8 colours etc.
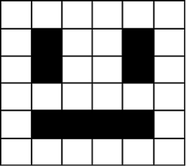
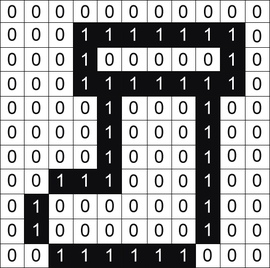
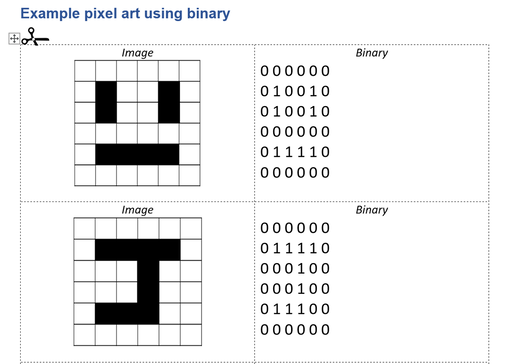
In a monochrome (two colour) image, like the example below, just 1 bit is needed to represent each pixel e.g. 0 for white and 1 for black.
Images are stored in scan lines. Each line is encoded from left to right, top to bottom. The image here would receive the following binary values:
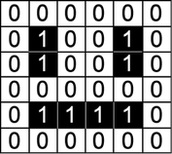
000000
010010
010010
000000
011110
000000
010010
010010
000000
011110
000000
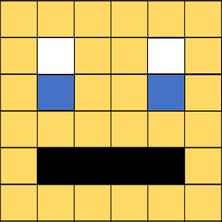
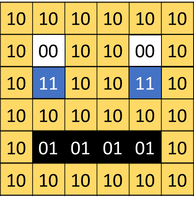
In an image that uses 4 colours, 2 bits are needed for each pixel. The following example uses two bits to store the following colours:
00 – White; 01 – Black; 10 – Yellow; 11 – Blue
00 – White; 01 – Black; 10 – Yellow; 11 – Blue
In order for the computer to interpret the image, the computer needs to know the following:
We call this extra piece of information “metadata”.
Want to know more?
To find out more about how a computer represents an image using binary, click on the links below:
- Colour depth – how many bits represent each pixel
- Resolution - Width & Height (in pixels)
We call this extra piece of information “metadata”.
Want to know more?
To find out more about how a computer represents an image using binary, click on the links below:
- GCSE Computing revision (Binary image representation) - http://mattg99.wordpress.com/2011/05/21/gcse-computing-revision-binary-image-representation/
- CS Unplugged (Image representation) http://csunplugged.org/image-representation
- BBC: Cracking the code (How pictures can be represented in the form of binary) - http://www.bbc.co.uk/programmes/p0166rgs
Lesson Outline:
In this lesson, students learn how a computer represents an image using binary.
In this lesson, students learn how a computer represents an image using binary.
Starter
Explain to students that data in computers is stored and transmitted as a series of ones and zeros, also referred to as “Binary”.
Display the following simple 1-bit image on the board and ask students to suggest how it could be converted to binary. Try to draw out answers such as "Use 0 to represent white and 1 to represent black" or "Use 0 to represent black and 1 to represent white".
Alternative Starter
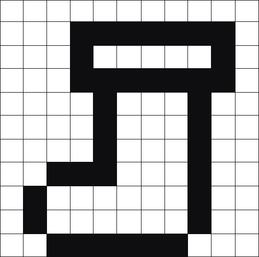
Ask the students to stand in a line and place on the floor (or table) a stack of white and stack of black paper/card (preferably cut into squares). Display the following image on the board / screen (See Binary_Starter.pdf) and explain to the students that each 0 represents a white card and each 1 represents a black card. Instruct students to, in turns, pick up the corresponding coloured card for the next number in the sequence (starting from left to right / top to bottom) and place it in the corresponding position on the floor / table. Inform students that, once they have placed down their card, they must return to the end of the line. (To aid the students, the teacher can cross off each number in the sequence after each turn).
Once the last card has been placed down, display the solution (Binary_Starter.pdf) and compare it to the solution on the floor/table.
Starter
| binary_starter_exercise_festive.pdf |
Main
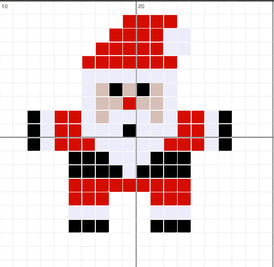
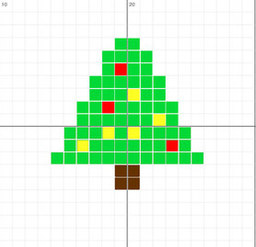
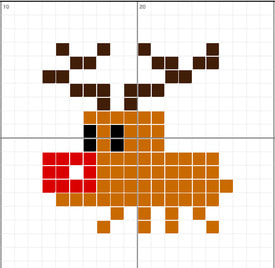
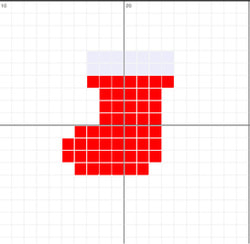
Display the following sequence of images.
Display the following sequence of images.
Explain to students that, in a computer, an image is broken down into tiny elements called pixels and that each pixel (short for picture element) represents one colour. Explain that an image with a resolution of 1024 by 798 pixels has 1024 x 798 pixels (817,152 pixels).
Tell students that, in order for the computer to store the image, each pixel is represented by a binary value (One or Zero). Explain that we call this representation of colours a “bit-plane” and that each bit doubles the number of available colours i.e. 1-bit would give us 2 colours, 2-bits would give us 4 colours and 3-bits would give us 8 colours etc.
Display the following image and ask the students how they think a computer would interpret it using binary? Draw out answers such as: 'Use 00 for white and 11 for black etc.' and 'Use two bits to represent each colour' etc.
Show the following example and explain that images are stored in “scan lines” and that each line is encoded from left to right --> top to bottom.
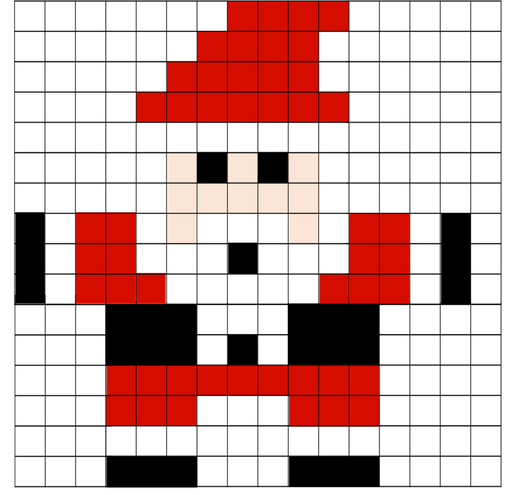
Show students the following image and ask them how they think a computer would represent an image containing 4 colours.
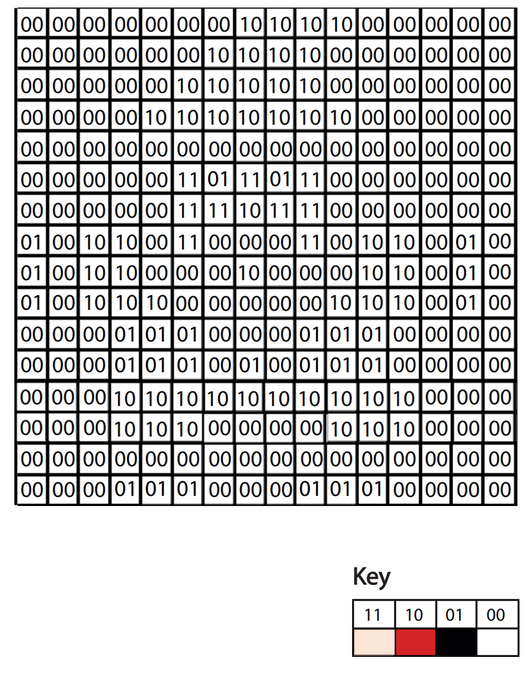
Explain to the students that in an image that uses 4 colours, 2 bits are needed for each pixel. The following example uses two bits to store the following colours:
00 – White; 01 – Black; 10 – Red; 11 – Beige
00 – White; 01 – Black; 10 – Red; 11 – Beige
Explain that we call this representation of colours a “bit-plane” and that each bit doubles the number of available colours i.e. 1-bit would give us 2 colours, 2-bits would give us 4 colours and 3-bits would give us 8 colours etc.
After showing students how a computer would represent a 2 colour and 4 colour image, ask the students to suggest how we could store more colours such as 16, 256 etc.
Inform the students that an image represented by 24-bits would have 16 million colours - 16,777,216 to be precise.
Explain to the students that, in this lesson, they will be creating their own bitmap images and converting these to binay. If necessary, model an example of this on the board (See support worksheet (below) for some examples to model.
Give each student a pre-printed computer science cracker joke, each with a different challenge attached – tasks based on level of ability. (See below). Instruct the students to complete the challenge attached to their cracker joke.
| cracker_jokes.pdf |
| bitmaps-blank.pdf |
| bitmaps-large.pdf |
Examples
Plenary
Write the following binary example on the board and ask the students how the computer would interpret the numbers.
101001001001101
Note: You can write any binary number on the board - the idea being for the students to ask questions such as how many colours etc.)
Ask students what does a computer need to know to be able to convert the image. Explain that, in order for the computer to interpret the file, the computer needs to know:
• Colour depth – how many bits represent each pixel
• Resolution - Width & Height (in pixels)
Finally, explain that we call this “metadata”
Alternative Plenary
Alternatively, finish by recapping the learning objectives using the Pose, Pause, Pounce and Bounce method.
Example:
Pose a question to the whole class e.g. Explain how a 16 colour image can be represented in binary
Pause to give students time to digest the question and think of their answer. If the students are engaged, try holding the pause for a little while longer to build up the tension.
Pounce: Quickly, select a student to answer the question. i.e. Insist the answer to the question comes from student A and possibly student B, directly and fast! Obviously, plan in your mind who you are going to direct the questions to before hand.
Bounce the question or student's response on to another student (immediately after the pounce). e.g. Ask them if they agree with the students previous answer and to explain why.
For more information about the Pose, Pause, Pounce and Bounce technique, visit: @teachertoolkit - http://teachertoolkit.me/2013/01/04/pppb-version2/
Support:
- Share with students some exmaples (see below)
| support.pdf |
Extension:
- Students can share the binary code of their favourite bitmap image with a classmate to see if they could convert it back to the original image.
- Some students can convert their image to hexadecimal (using the help sheets provided below)
| bin2hex.pdf |
Keywords:
Binary Representation of Images (Festive Edition) lesson is licenced under a Creative Commons Attribution 4.0 International License.
Tags: GCSE, KS4, KS3, Theory, Computing Theory, CS Theory, Binary, Binary Representation, binary 2, binary conversion, how to do binary conversion, counting binary, binary number to decimal, binary 101, 8 binary, binary digits, binary digit, meaning of binary
