How to create a Storify
Before you start, you’re going to need to setup an account. If you already have a Storify account, you can skip to the next section.
Creating a Storify
1. Visit: www.storify.com
Before you start, you’re going to need to setup an account. If you already have a Storify account, you can skip to the next section.
Creating a Storify
1. Visit: www.storify.com
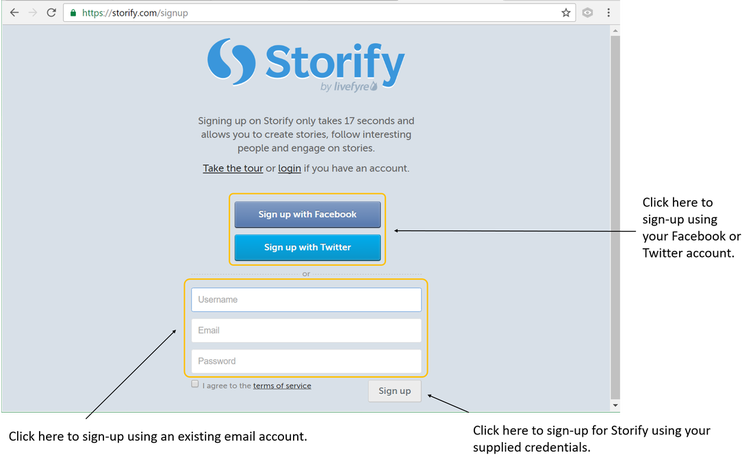
2. Click on ‘Sign Up Free’. Storify gives you the option to either sign in with your existing social media accounts (Currently either Twitter or Facebook) or sign up using an existing email account.
Once you’re signed in, you will be able to create your first story. Note: Signing in with Facebok or Twitter requires you to authorise Storify to access your account.
Creating your first Storify
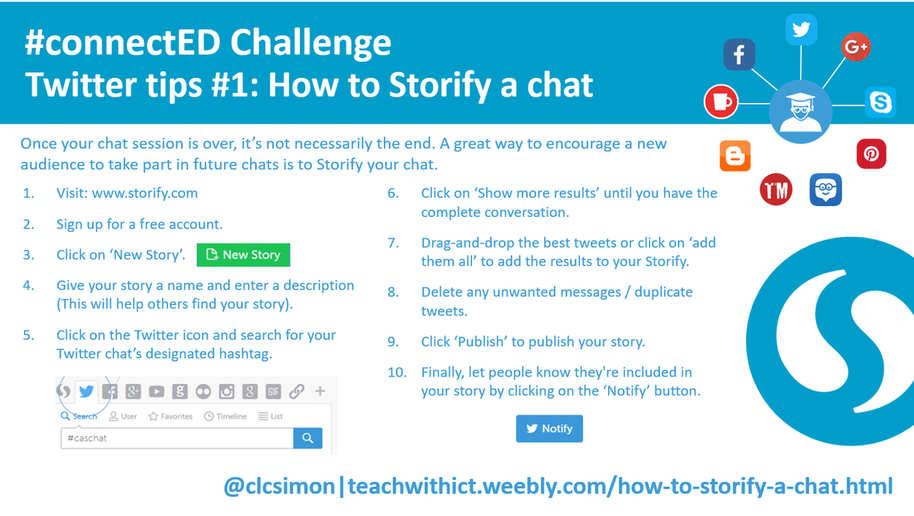
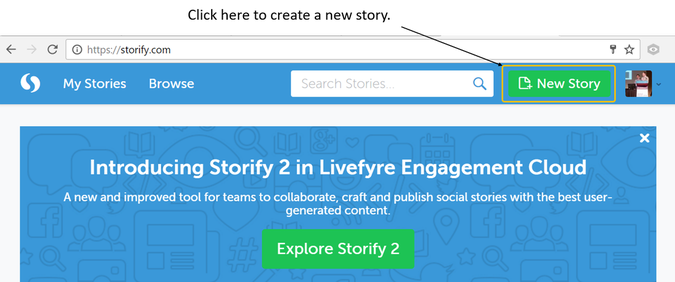
1. Click on ‘New Story’ to create a new story.
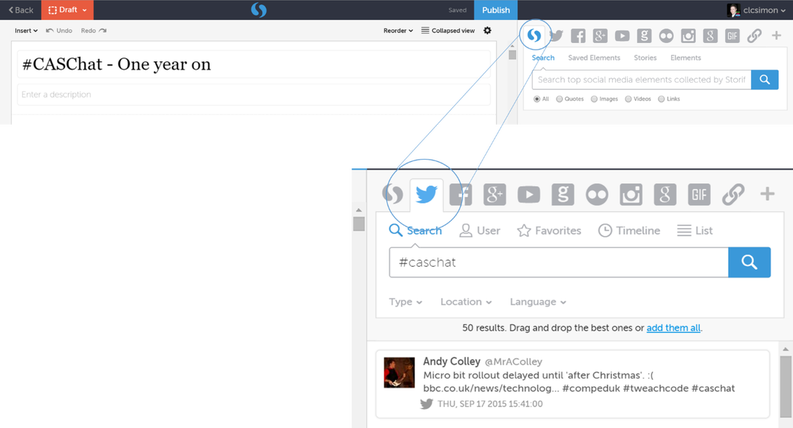
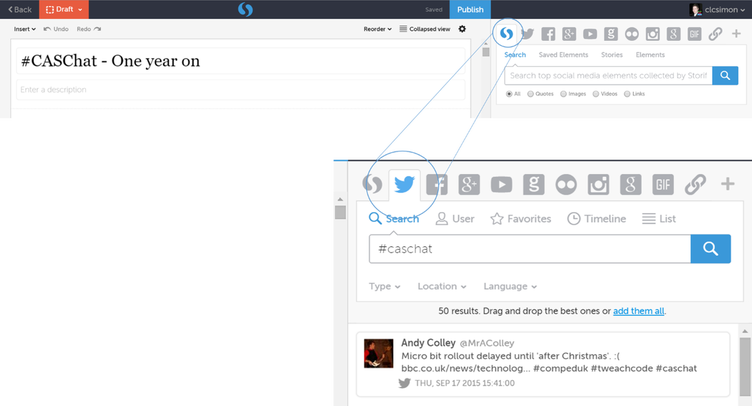
2. Give your story a name and enter a description (This will help others find your story).
3. Click on the Twitter icon (Top right hand corner) and type in the search bar the hashtag or keyword you wish to search for.
3. Click on the Twitter icon (Top right hand corner) and type in the search bar the hashtag or keyword you wish to search for.
4. Scroll down to the bottom of the list of results and click ‘Show more results’
5. Once you’ve reached the end of your results, click on ‘add them all’. Note: Currently, you’re limited to 1000 Tweets per story.
6. Delete any unwanted messages.
Hover over a message to reveal the delete option.
7. Click on ‘Publish’ to publish your story.
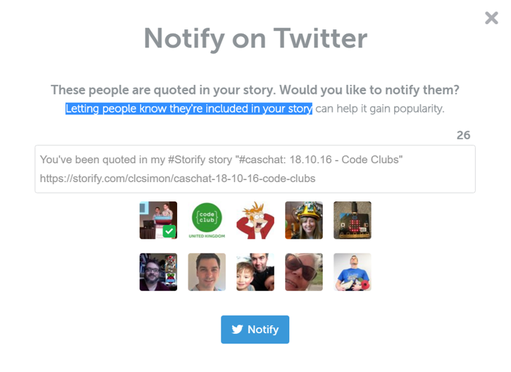
8. Finally, let people know they're included in your story by clicking on the ‘Notify’ button.
8. Finally, let people know they're included in your story by clicking on the ‘Notify’ button.


