Micro:bit Physical computing guides
No. 10: Push Buttons
Connecting a Push Button to a micro:bit
Instructions on how to attach a Push Button to a BBC micro:bit.
What you will need
Instructions on how to attach a Push Button to a BBC micro:bit.
What you will need
- BBC micro:bit
- Micro USB cable
- Battery pack with 2 x AAA batteries
- 1 x Push Button
- 2 x Crocodile clip leads
Understanding push buttons
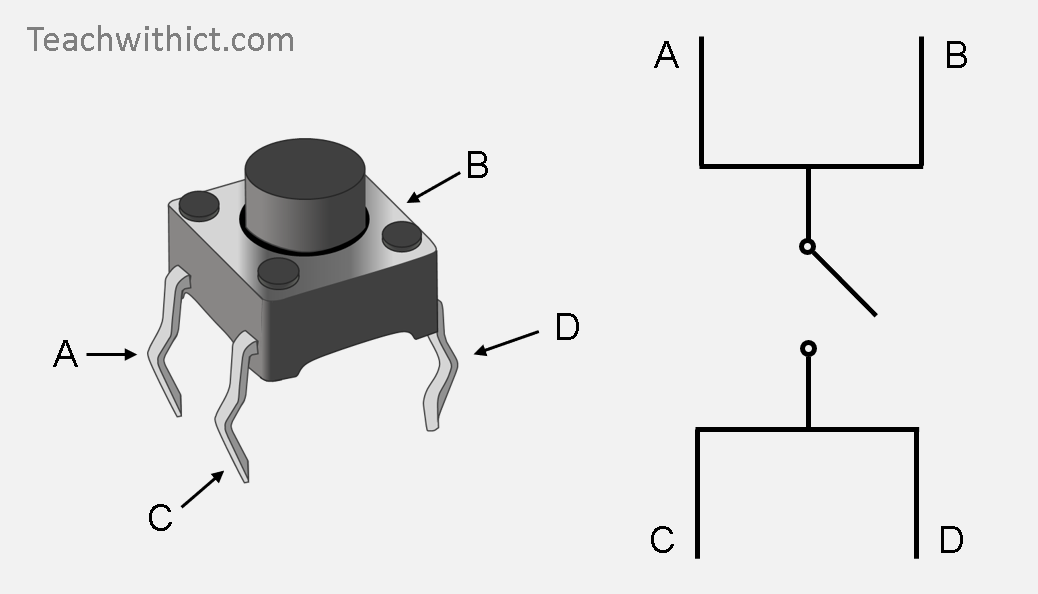
Small push buttons can be used to add extra inputs to your micro:bit. Push buttons, like the ones on your micro:bit (labelled A & B), are said to be momentary as the button needs to be held down to close (or complete) the circuit.
The switch is activated by holding down (or pressing) the push button. This creates a bridge between the two sets of legs (connecting the 3 volts) and sends a HIGH signal (or 1) to the micro:bit.
Despite having four legs, a push button only has two connections (see image below). When the button is pressed, a connection is made between the two sets of legs (or pins).
Pull-down Resistor?
Typically, when adding a push button to a circuit, we need to add a pull-down resistor to ensure that, when the button is not pressed, we get a constant LOW signal (or 0) reading. Conveniently, the micro:bit already has internal pull-up and pull-down resistors built-in which are automatically triggered when a digital input is read by the microbit meaning that we don’t need to add any extra resistors to our circuit.
For a simple explanation of why we need pull-up / pull-down resistors, click here: https://medium.freecodecamp.org/a-simple-explanation-of-pull-down-and-pull-up-resistors-660b308f116a.
Push button
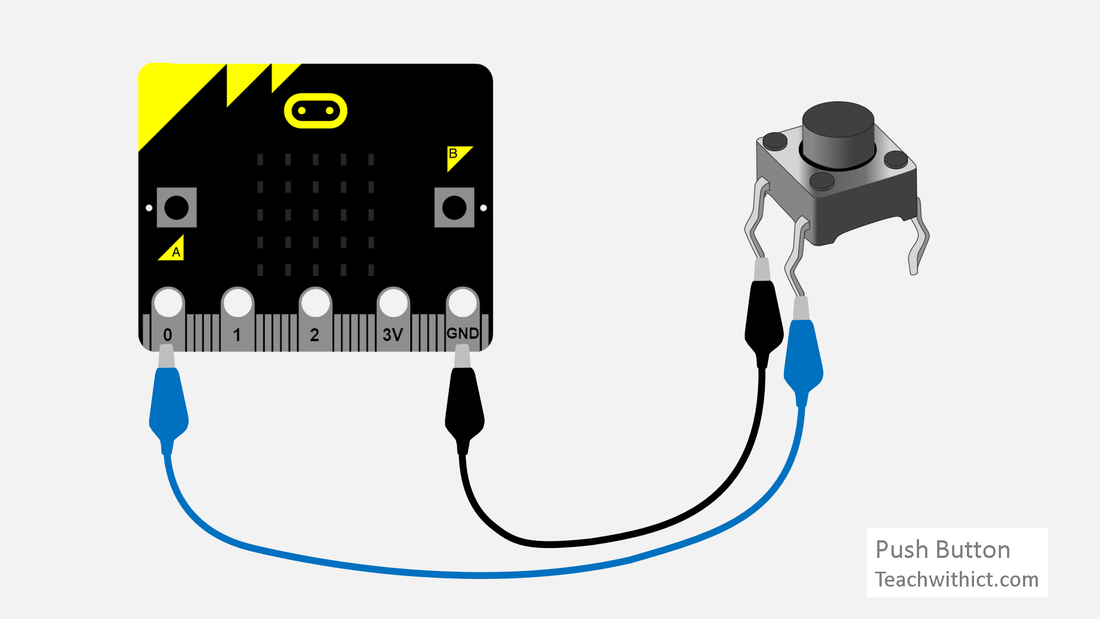
Wiring instructions
- Disconnect the micro:bit from your computer and disconnect the battery pack.
- Using crocodile clips, connect leg A of the push button to GND, and leg C to Pin 0 on the BBC micro:bit.
Programming your Push Button
Copy the code below:
Programming your Push Button
Copy the code below:
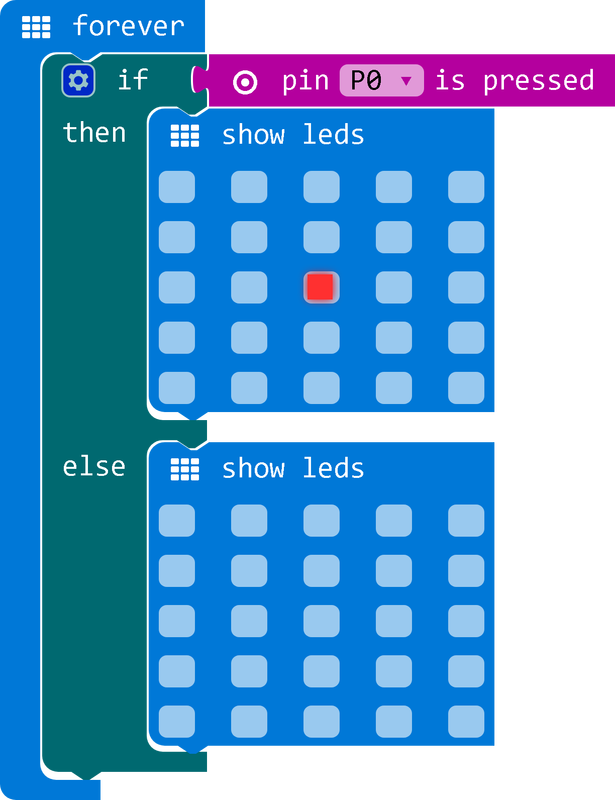
Note: You can also use the 'on pin pressed' block to activate your code:

Testing your code
Testing your code
- Download your program to your micro:bit.
- Reconnect your battery and run your program.
Frequently Asked Questions
Q1: What is a push button?
Q2: How do I connect a push button to a micro:bit?
Q3: Do I need additional resistors?
Q4: How can I program the micro:bit to respond to button presses?
- A1: A push button is a momentary switch that completes a circuit when pressed, sending a signal to the micro:bit.
Q2: How do I connect a push button to a micro:bit?
- A2: Connecting a push button involves using crocodile clips to connect one leg to GND and another to a pin on the micro:bit (e.g., Pin 0).
Q3: Do I need additional resistors?
- A3: No additional resistors are needed as the micro:bit has built-in pull-up and pull-down resistors.
Q4: How can I program the micro:bit to respond to button presses?
- A4: Programming can be done using the ‘on pin pressed’ block in the MakeCode editor to activate your code when the button is pressed.