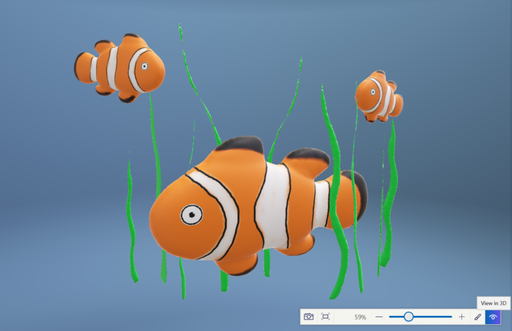
How to create a clown fish with Paint 3D
Blink and you may have missed it but a recent update for Microsoft’s Windows 10 operating system called ‘Creators Update’ saw the return of an old classic - Microsoft Paint. However, be forgiven for not recognising it as it’s received a bit of a make-over! Paint 3D, as the name suggests, is a 3D version of Microsoft’s built-in Paint app which allows you to build and paint 3D objects with relative ease.
To celebrate the launch of Paint 3D, I've created a step-by-step tutorial to wet your appetite:
Step 1
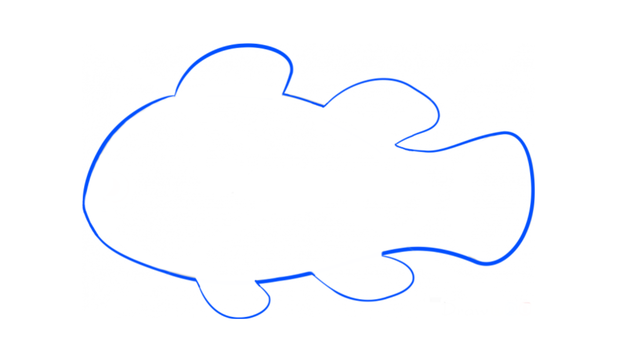
Download the clown fish template below (Right click and save as).
Step 2
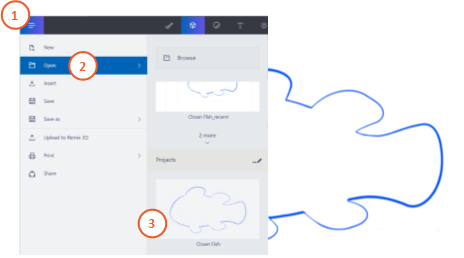
Open the clown fish template in Paint 3D.
Step 3
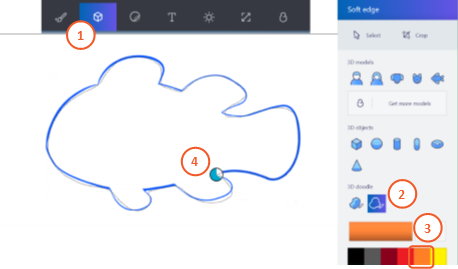
Select the 3D Objects menu (1). Choose the Soft Doodle pen (2). Pick orange from the colour palette (3) and draw the outline of a clown fish (4).
Step 4
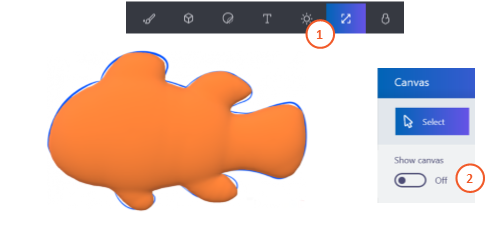
Select the Canvas menu (1). Slide the Show canvas button to the off position to hide the canvas (2).
Step 5
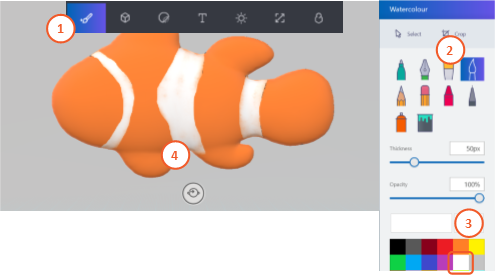
Select the Tools menu (1). Choose the Watercolour brush (2). Pick white from the colour palette (3) and paint some white stripes on the clown fish (4).
Step 6
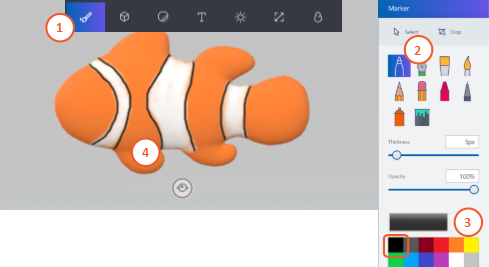
Select the Tools menu (1). Choose the marker pen (2). Pick black from the colour palette (3) and paint some black outlines around your white stripes (4).
Step 7
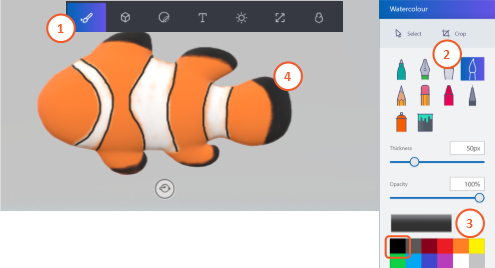
Select the Tools menu (1). Choose the Watercolour brush (2). Pick black from the colour palette (3) and paint some black fin & tail markings (4).
Step 8
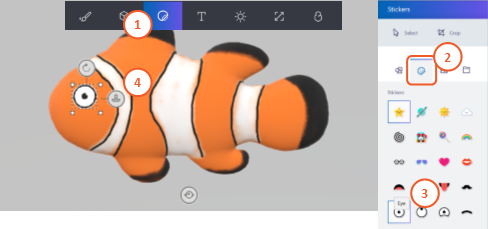
Select the Stickers menu (1). Choose Stickers (2). Select the eye (3) and click where you want to place it on your fish. Resize your sticker to fit your fish and click on the stamp button when you’re finished (4).
Step 9
Add some more fish to your scene and include some underwater plants. Change the background colour to make it look like a underwater scene.

