Micro:bit Physical computing guides
No. 1: LEDs
Connecting an LED to a micro:bit
Instructions on how to attach an LED to a BBC micro:bit.
What you will need
Instructions on how to attach an LED to a BBC micro:bit.
What you will need
- BBC micro:bit
- Micro USB cable
- Battery pack with 2 x AAA batteries
- Selection of LEDs
- Selection of resistors
- 3 x Crocodile clip leads
|
Understanding LEDs
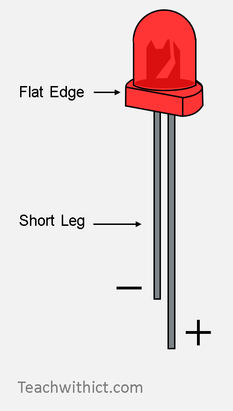
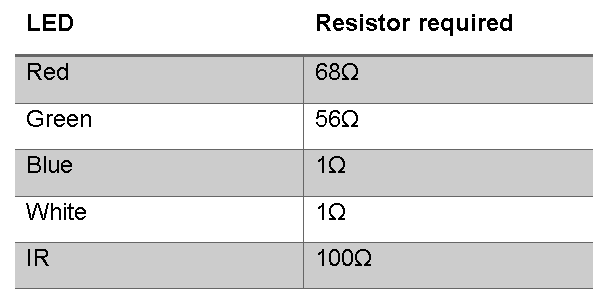
When connecting an LED, as with any component, it’s important that we connect it the right way round. On closer inspection, you will notice that your LED has one leg shorter than the other. The longer leg (Anode) connects to a power source and the shorter leg (Cathode) connects to GND (Ground). Connecting your LED the wrong way round will most likely cause your LED to blow! Understanding Resistors A resistor is required to limit the power supplied to an LED. Without it, the LED could blow. Resistors come in a variety of shapes and sizes however, fortunately for us, there is an easy way to find out which resistor we need! With Ohm’s Law, it is possible to calculate the resistor required for each type of LED. Typically, the following resistors can be used with each type of LED: |
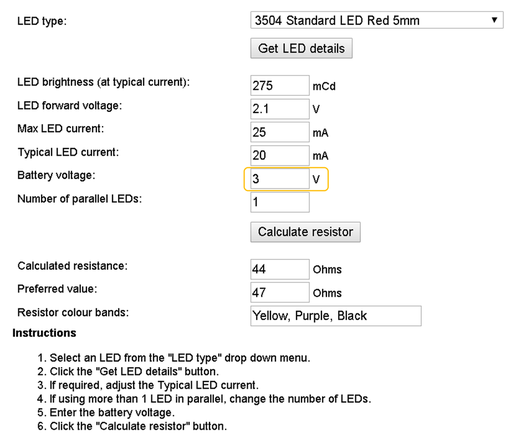
Kitronik provide a handy resistor value calculator https://www.kitronik.co.uk/blog/led-resistor-value-calculator/ to help you choose the right resistor for your project.
Tip: When calculating the resistor required, remember to input the correct voltage!
Wiring instructions
- Disconnect the micro:bit from your computer and disconnect the battery pack.
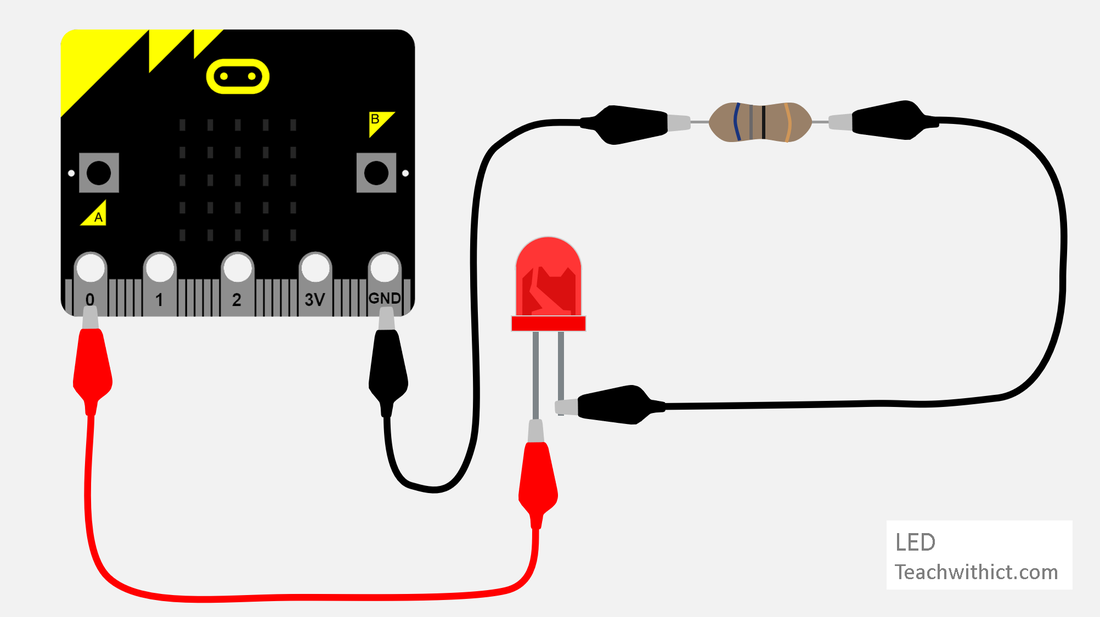
- Use a crocodile clip to connect the short (Cathode) leg of your LED to either end of your resistor.
- Connect another crocodile clip from the other end of your resistor to GND on your micro:bit.
- Connect a crocodile clip to the long (Anode) leg of your LED and attach it to Pin 0.
Programming your LED
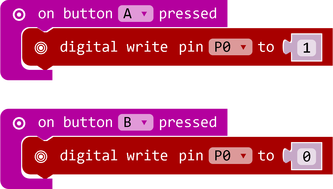
Copy the below:
Programming your LED
Copy the below:
Testing your code
Testing your code
- Download your program to your micro:bit.
- Reconnect your battery and run your program.
