Micro:bit Servo Animals
Step 1
Cats & Dogs:
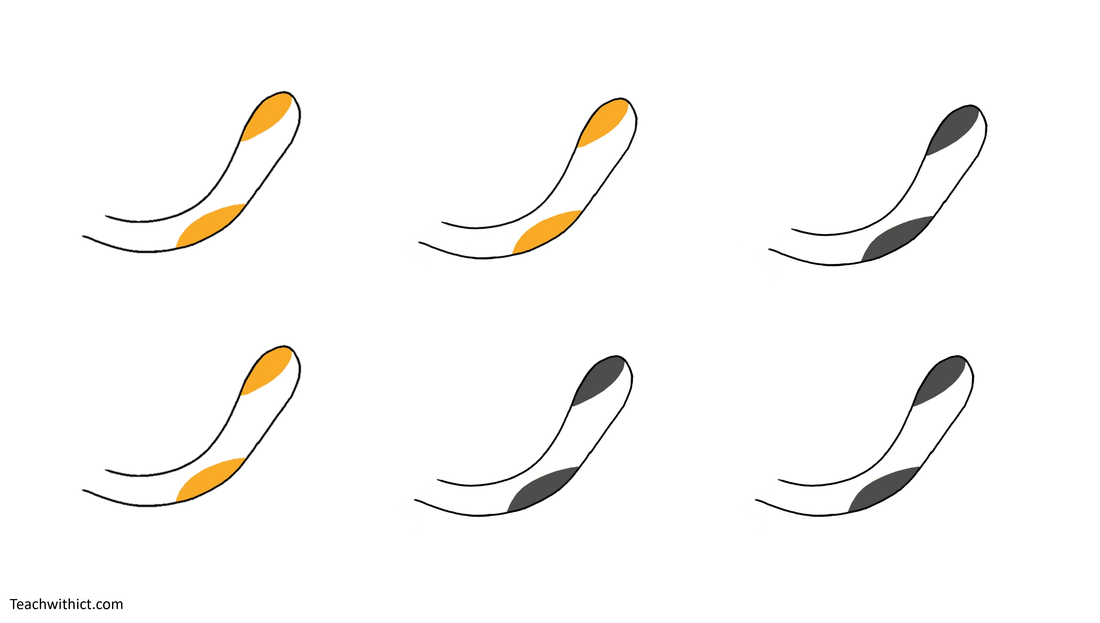
- Download and print one of the following templates (or create your own).
Cats & Dogs:
| servo_animals.pdf |
Gruffalo:
| gruffalo.pdf |
|
Step 2 - Assembly
|
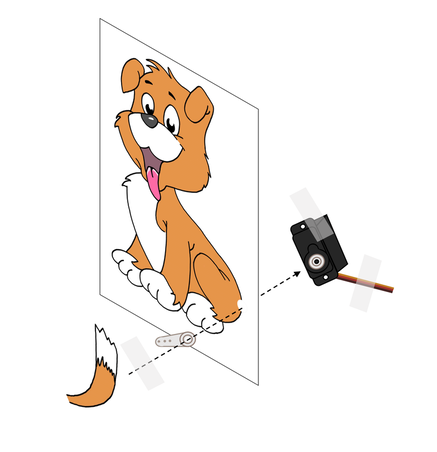
Connecting a Servo to a micro:bit
Instructions on how to attach a Servo to the micro:bit.
Instructions on how to attach a Servo to the micro:bit.
Servo
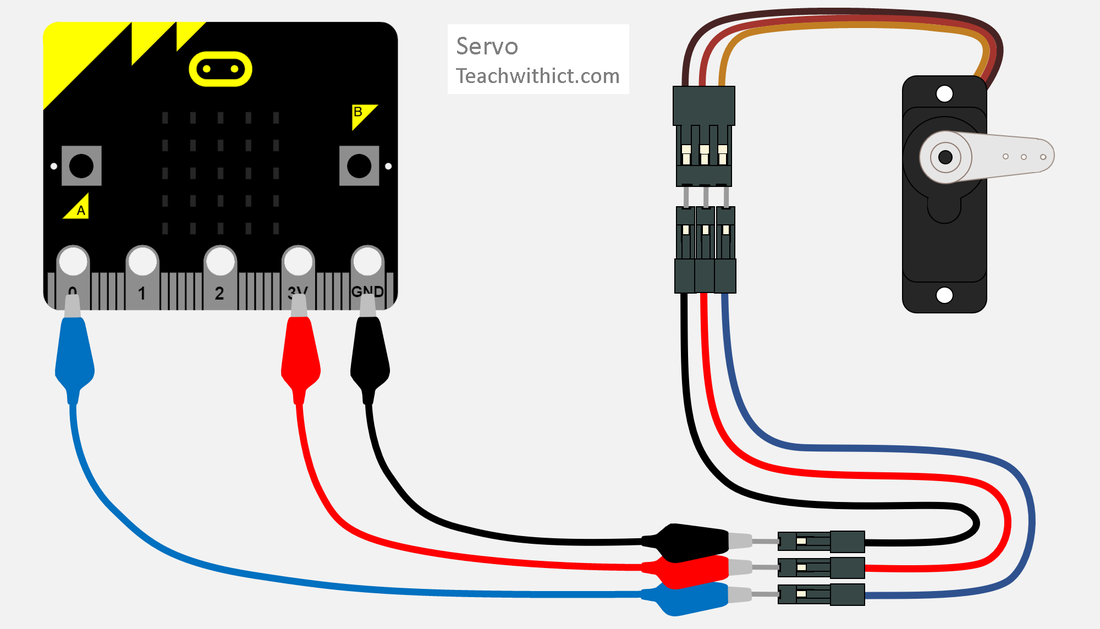
Wiring instructions
- Disconnect the micro:bit from your computer and disconnect the battery pack.
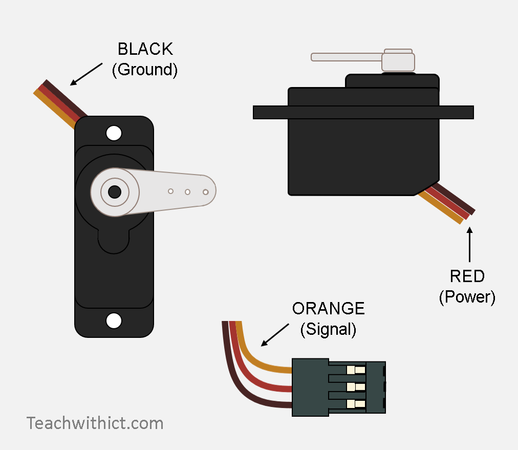
- Insert the jumper wires into the servo plug. See figure 1. (if you don’t have a black, red or orange jumper wires, you can replace these with any colour you wish as long as you remember which jumper wire is connected to which lead on your servo!)
- Connect the crocodile clips to the corresponding jumper wires:
- Brown to GND pin.
- Red to 3V.
- Orange to Pin 0.
Connecting an external power supply to a servo
Whilst these micro-servos can work with the micro:bit, the specified operating voltage for most servo motors is around +5V and that the micro:bit can only supply a small amount of power to connected circuits (3V and 90mA V1 and 190mA V2max). Trying to draw more power than the micro:bit can safely supply, could lead to damaging the device.
For micro:bit V1, the most reliable way to use this type of servo is to power the micro:bit via a battery pack and to use fresh batteries, as the battery voltage drops the servo will become less reliable.
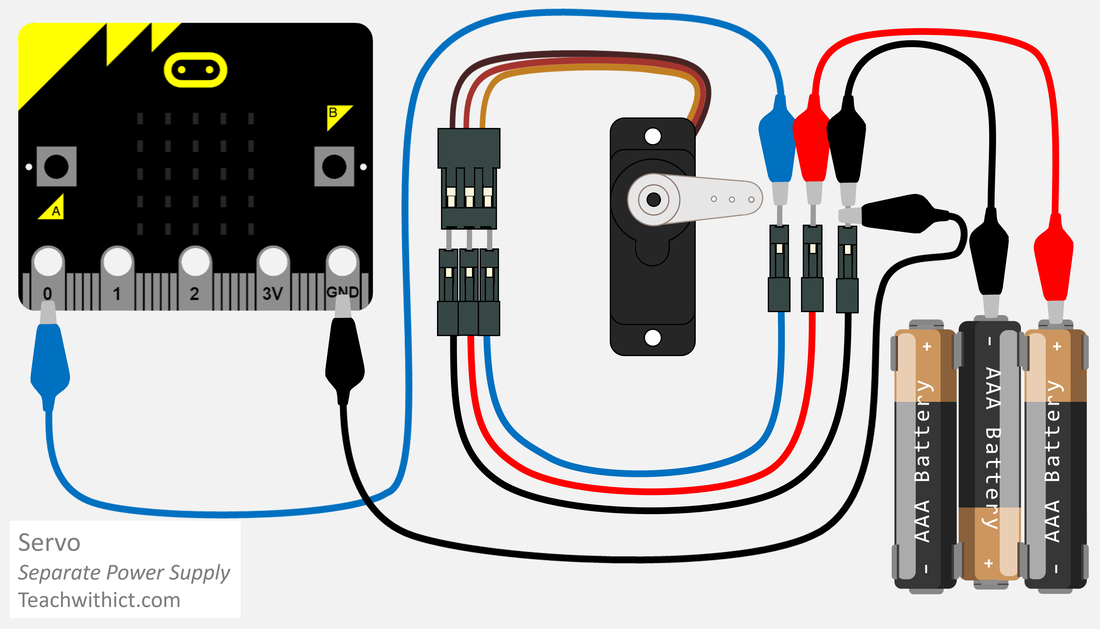
Connecting an external power supply to a servo
The optimal method for connecting a servo is to use a separate battery pack to power the servo and use the micro:bit to control it. This way you are only connecting Pin0 and GND from the micro:bit to the servo (we still need to use GND to share a common ground with other parts of the circuit).
WARNING! The external battery pack supplies a higher voltage than the micro:bit. Do not connect the positive (+/red) wire from an external battery pack to the micro:bit as you will damage it.
For more guidance on connecting servos to the micro:bit, check out the official help guide: Using a servo with the micro:bit : Help & Support (microbit.org)
For more guidance on connecting servos to the micro:bit, check out the official help guide: Using a servo with the micro:bit : Help & Support (microbit.org)
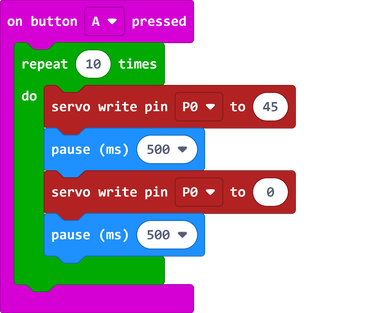
Programming your Servo Animal
Copy the below:
Programming your Servo Animal
Copy the below:
Testing your code
Testing your code
- Download your program to your micro:bit.
- Reconnect your battery and run your program.


